
Authenticate to Simplelists with Auth0 and SAML2
Work through each section in order – later steps depend on values generated in earlier ones.
Log In to the Auth0 Admin Dashboard
Before you create anything, make sure you are logged into the correct Auth0 tenant. Organizations often have separate tenants for development, staging, and production. Creating the application in the wrong tenant is the most common setup error at this stage, because the metadata URLs and certificate you download later will be specific to that tenant.
-
Log on to your Auth0 Admin Console
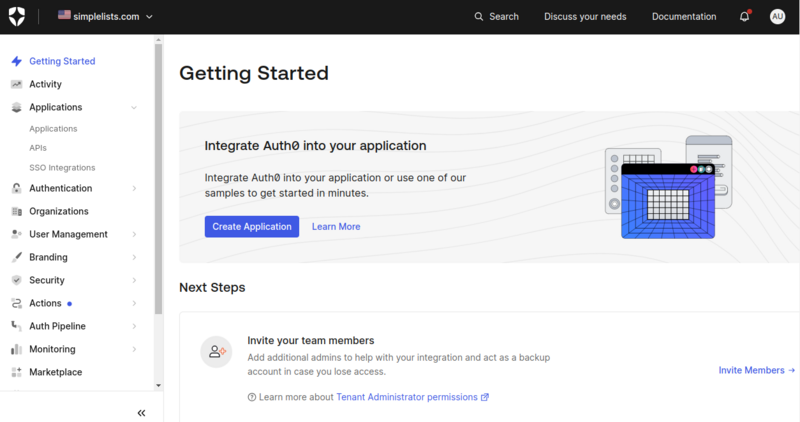
- Click Applications under the Application menu
- Click Create Application
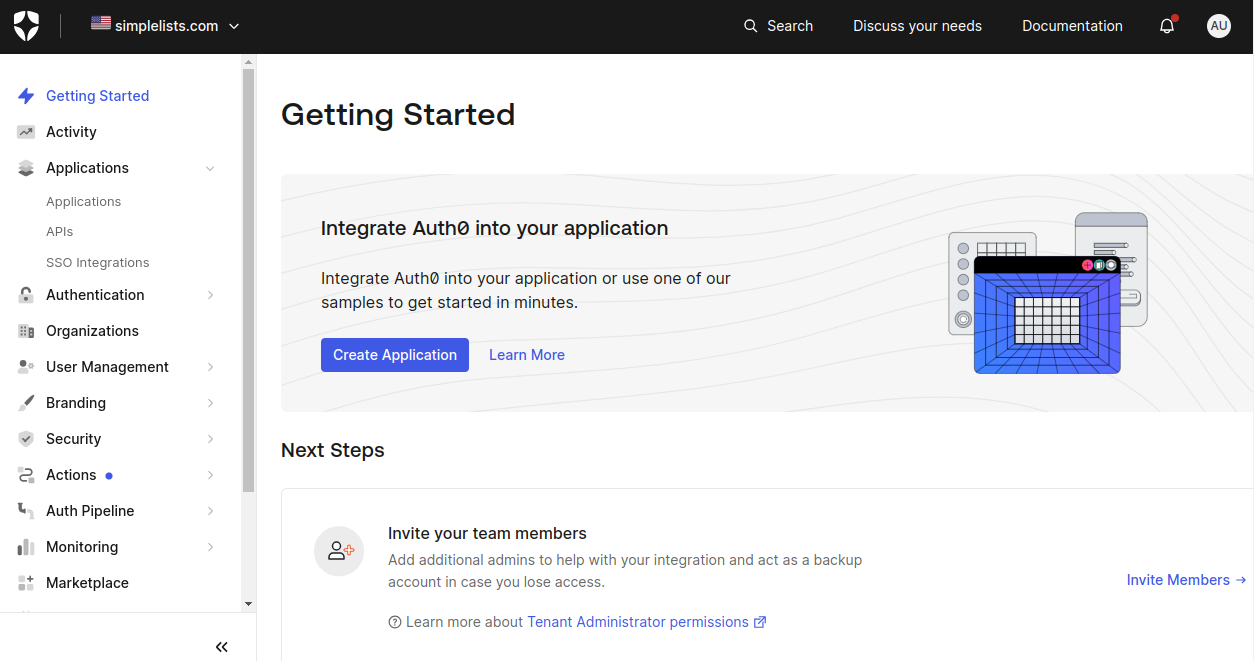
- Wrong tenant selected: If the dashboard looks different from the screenshot, or your usual applications are not listed, you are likely in the wrong tenant. Check the tenant name shown in the top-right corner of the Auth0 dashboard before proceeding.
- Insufficient permissions: If the Create Application button is grayed out or missing, your Auth0 user account may not have the Administrator role within that tenant. Contact your Auth0 tenant owner.
- The screenshots provided here were accurate for Auth0 at the time they were created. It is possible that Auth0 has changed the format of the screens over time. Regardless, the SAML2 standard has not changed and it should still be possible to work through the configuration with the details provided. Please contact Simplelists support if you require assistance.
Create Application
This step registers a new application record in Auth0. The application type controls which authentication flows are available – you need Regular Web Application because SAML2 requires a server-side redirect flow, not a single-page or native app flow.
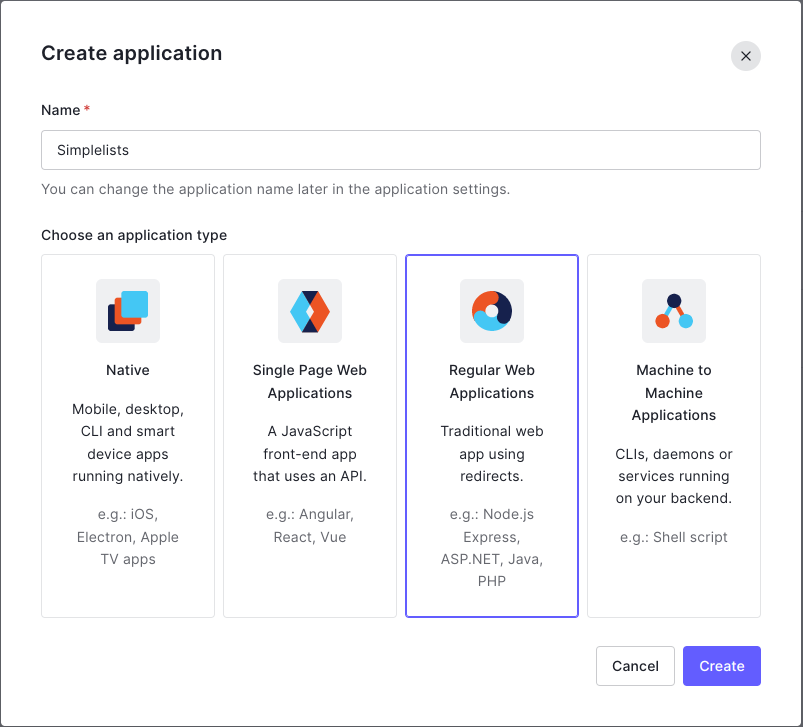
- Enter a Name
- Select Regular Web Application
- Click Create
Give the application a name that clearly identifies it as your Simplelists integration (for example, “Simplelists SAML2”). This name appears in Auth0’s application list and in user consent screens, so something recognizable will save confusion later.
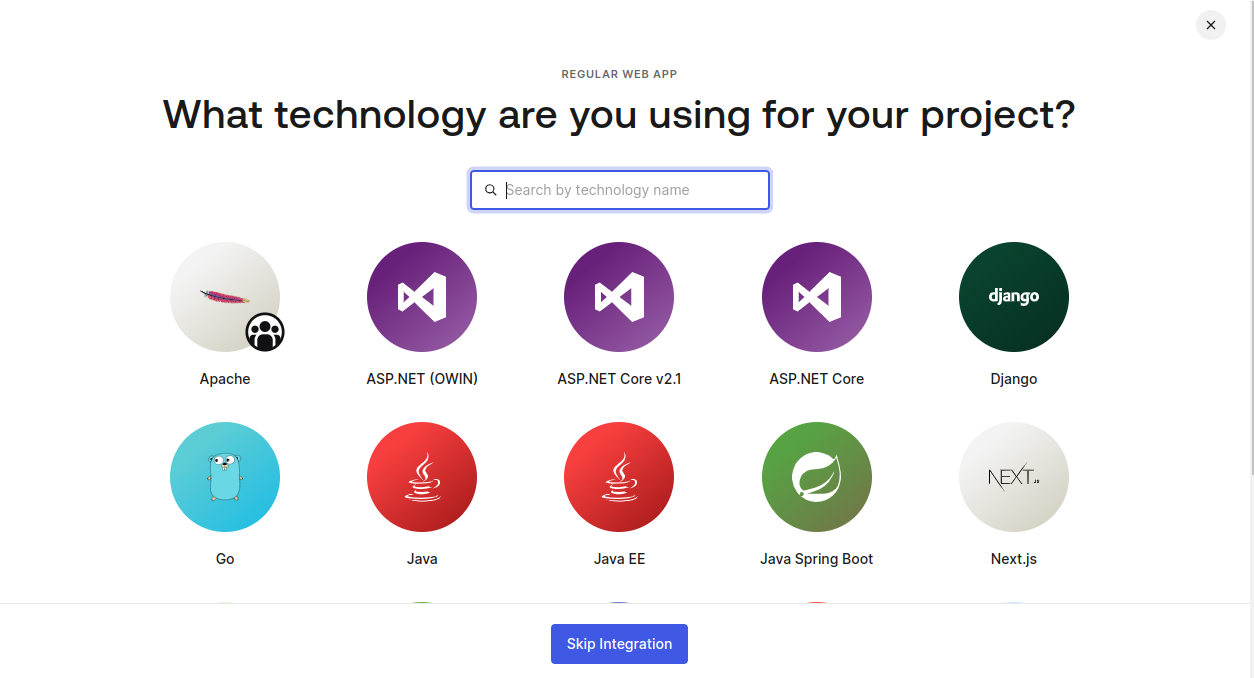
- Click Skip Integration
Why this matters: Selecting the wrong application type (for example, Single Page Application or Native) will result in SAML2 add-ons not appearing in the Addons tab in the next section. If you reach the Addons tab and do not see the SAML2 Web App toggle, the application type is the most likely cause.
Clicking Skip Integration dismisses the framework quick-start wizard. That wizard is for OAuth/OIDC setups and is not relevant to SAML2 – skipping it takes you straight to the application settings where the SAML configuration lives.
- SAML2 Web App addon not visible later: This almost always means a non-Regular Web Application type was selected here. The fix is to create a new application with the correct type; application types cannot be changed after creation.
- Name conflicts: Auth0 allows duplicate application names, so do not rely on the name alone to identify your integration – note down the Client ID shown after creation.
Configure Application
Now that the application record exists, you need to activate the SAML2 capability within it. Auth0 treats SAML2 as an “addon” – it is not enabled by default. Enabling the toggle creates the SAML2 endpoint and makes the identity provider metadata available.
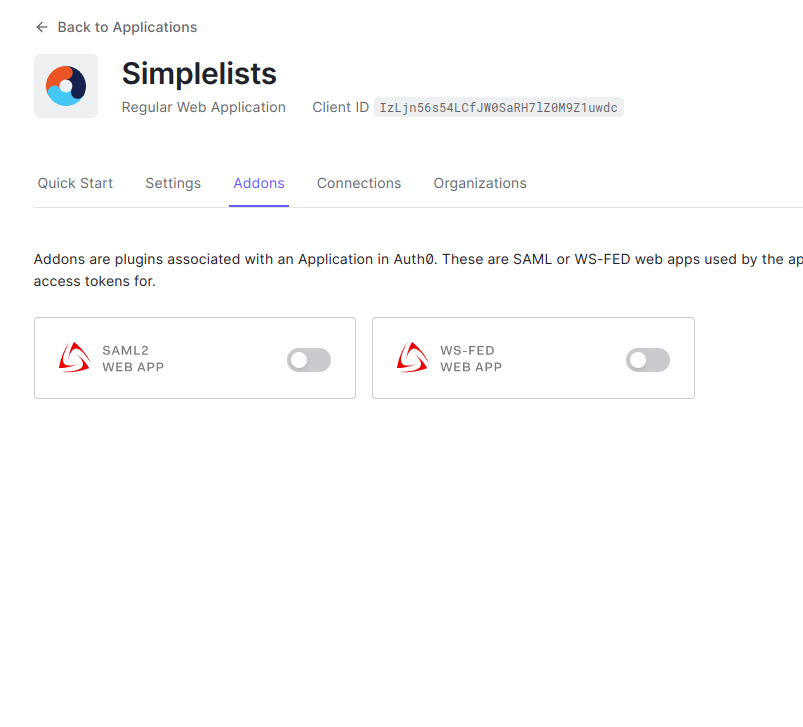
- Click Addons
- Click toggle for SAML2 Web App
- Addons tab not visible: This confirms the application type was set incorrectly in the previous step. Recreate the application as a Regular Web Application.
- Toggle saves but nothing happens: After enabling the toggle, a configuration modal should appear automatically. If it does not, click the SAML2 Web App addon tile again to open the settings panel.
Settings
This section is where you collect the two pieces of information that Simplelists needs about your Auth0 Identity Provider: the metadata XML and the signing certificate. These tell Simplelists where to send users for authentication and how to verify that SAML responses are genuinely from your Auth0 tenant.
From the Configuration Parameters you obtain the Metadata and Certificate.
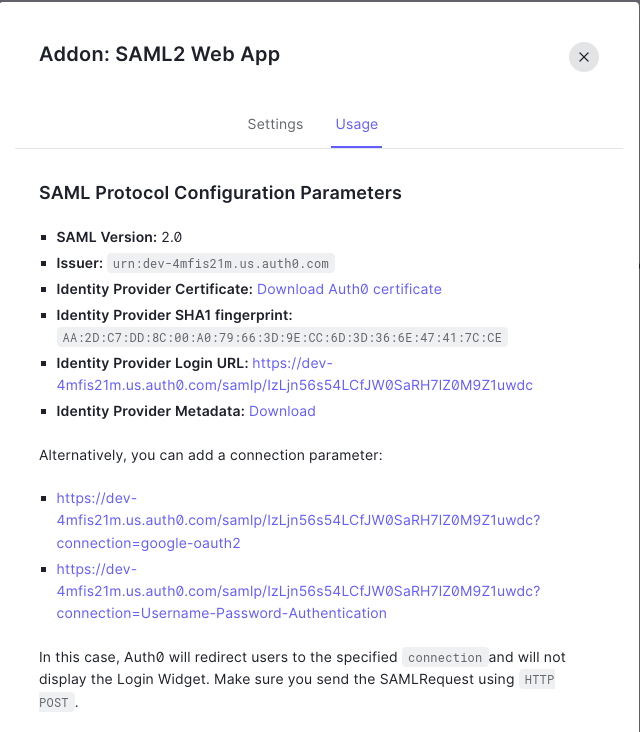
You can download the following to use with Simplelists:
- Identity Provider Metadata Download
- Identity Provider Certificate: Download Auth0 certificate
Configure the Settings
- Click Settings
Why this matters: The metadata XML contains your Auth0 tenant’s SAML endpoint URLs (where Simplelists will redirect users for login) and the certificate used to sign assertions. If Simplelists does not have the correct metadata, it cannot redirect users to the right Auth0 login page. If it does not have the correct certificate, it cannot verify that the SAML response is authentic, and logins will be rejected even if the credentials are correct.
The certificate has an expiry date. If you are setting this up for a production environment, note the certificate expiry and plan to rotate it before it lapses – an expired certificate will cause all SAML logins to fail.
- Metadata download produces a blank or error page: This can happen if the SAML2 addon was enabled but the application configuration was not saved. Return to the Addons tab, click the SAML2 Web App tile, and confirm the addon shows as active.
- Certificate download gives a .pem file instead of .cer: Both formats contain the same certificate data. Simplelists accepts either; confirm the expected format in your Simplelists SAML settings before uploading.
- Expired certificate causing login failure later: If the integration worked previously but users now receive an authentication error, check whether the Auth0 certificate has expired. The Auth0 dashboard shows the certificate validity dates in this same panel.
Configure
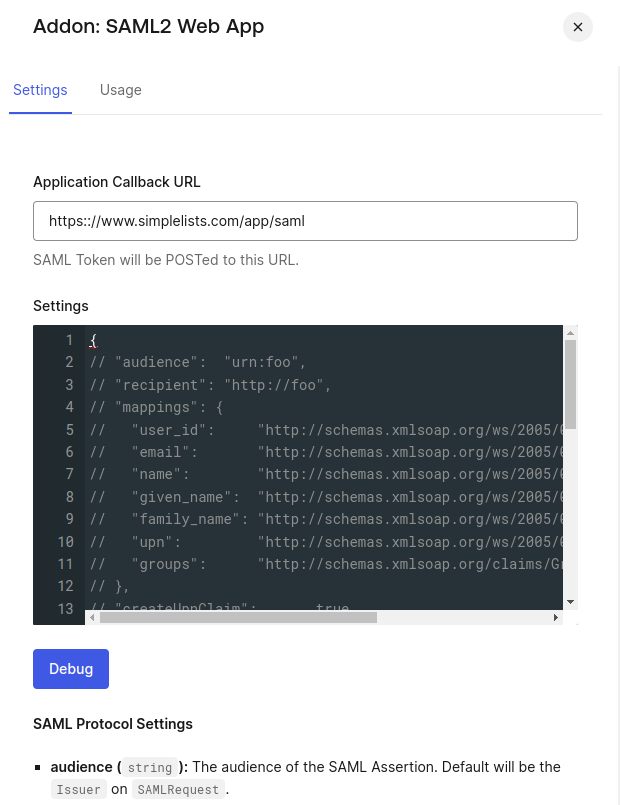
This is the most technically involved step. You are providing Auth0 with the details it needs about Simplelists: where to send the SAML assertion after login (the callback URL), and how to sign and format that assertion. The JSON configuration block defines the audience, the attribute mappings, the signing algorithm, and the certificate used to sign responses.
-
Enter the Application Callback URL for Simplelists (Reply URL)
- The settings are commented out – you need to uncomment the required settings
The following are the minimum settings:
NOTE: The signingCert has to be formatted as a single line with embedded newlines. This is rather painful. The easiest method is to use vi (vim) and use the following command:
%s/\n/\\n/g
Which translates to: replace all real newlines with the characters that are interpreted as new lines \n. The extra \ escapes the \n in \n.
{
 "audience": "https://www.simplelists.com/app/saml/xml",
    "mappings": {
        "email": "http://schemas.xmlsoap.org/ws/2005/05/identity/claims/emailaddress",
        "given_name": "http://schemas.xmlsoap.org/ws/2005/05/identity/claims/givenname",
        "family_name": "http://schemas.xmlsoap.org/ws/2005/05/identity/claims/surname"
    },
    "nameIdentifierProbes": [
        "http://schemas.xmlsoap.org/ws/2005/05/identity/claims/emailaddress"
    ],
    "nameIdentifierFormat": "urn:oasis:names:tc:SAML:1.1:nameid-format:emailAddress",
    "signatureAlgorithm": "rsa-sha256",
    "digestAlgorithm": "sha256",
    "signResponse": true,
    "signingCert": "-----BEGIN CERTIFICATE-----\nMIIFHTCCAwWg......weyztkNjtcSi8WD2XEtEeUQ=\n-----END CERTIFICATE-----\n"
}
Why This Matters – Field by Field
The audience value (https://www.simplelists.com/app/saml/xml) is the unique identifier that tells Auth0 which service this SAML assertion is for. If this value does not exactly match what Simplelists expects, Simplelists will reject the assertion as not intended for it – users will see an authentication error even though Auth0 successfully authenticated them.
The mappings block translates Auth0’s internal profile fields into the standard SAML attribute names that Simplelists reads. The email mapping is essential – without it, Simplelists cannot identify which user account to log the user into. The given_name and family_name mappings populate the user’s display name in Simplelists.
The nameIdentifierProbes and nameIdentifierFormat settings tell Auth0 to use the user’s email address as the unique identifier in the SAML assertion (NameID). Simplelists uses this to match the assertion to a specific user account. If the format does not match, logins will fail with an “invalid NameID format” error.
Setting signResponse: true means Auth0 signs the entire SAML response, not just the assertion within it. This provides stronger verification and is required by Simplelists.
The signingCert is the certificate Simplelists uses to verify Auth0’s signature on the SAML response. This must be the certificate from your specific Auth0 tenant (downloaded in the Settings step above) – pasting a certificate from a different tenant or environment will cause signature verification to fail. The single-line formatting requirement exists because JSON does not support multi-line strings; the \n characters represent the line breaks that a PEM certificate normally contains.
- Callback URL mismatch: The Reply URL (Application Callback URL) you enter must exactly match the URL that Simplelists provides for SAML responses – including the protocol (https), the domain, and any path. Even a trailing slash difference will cause Auth0 to reject the redirect as an unrecognized callback.
- signingCert formatting errors: If the certificate still contains literal line breaks (rather than \n character sequences), Auth0 will reject the JSON as malformed. If you see a JSON parse error on save, the certificate formatting is the most likely cause. The vim command shown above is the simplest method to fix this.
- Commented-out settings not uncommented: The Auth0 settings panel pre-populates the JSON with many settings commented out (preceded by //). Only the minimum settings shown above need to be present and uncommented for a working first-time setup. Leaving required fields commented out means Auth0 will use its defaults, which may not match what Simplelists requires.
User Settings for Name
Auth0 stores users’ given name and family name in a specific way that differs from most identity providers. Because Auth0 does not provide a standard profile form for entering a user’s full name, that information needs to be added manually through the user’s metadata. This step ensures that when Simplelists receives the SAML assertion, it has the name details needed to populate the user’s profile correctly.
-
Select User Management
- Select Users
- Select the user
-
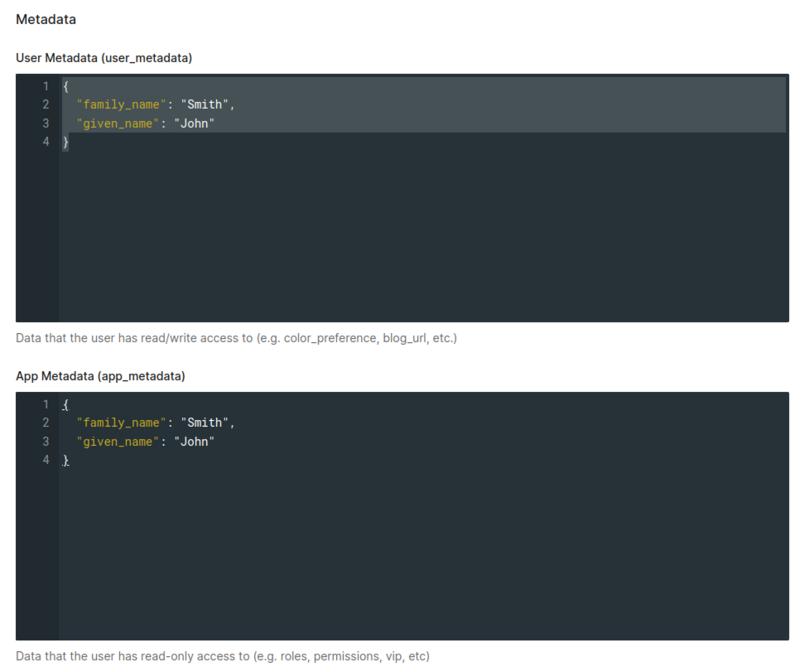
Scroll down to the Metadata and App Metadata
-
Add the following to both the Metadata and App Metadata:
{ "family_name": "Smith", "given_name": "John" } - Click Save
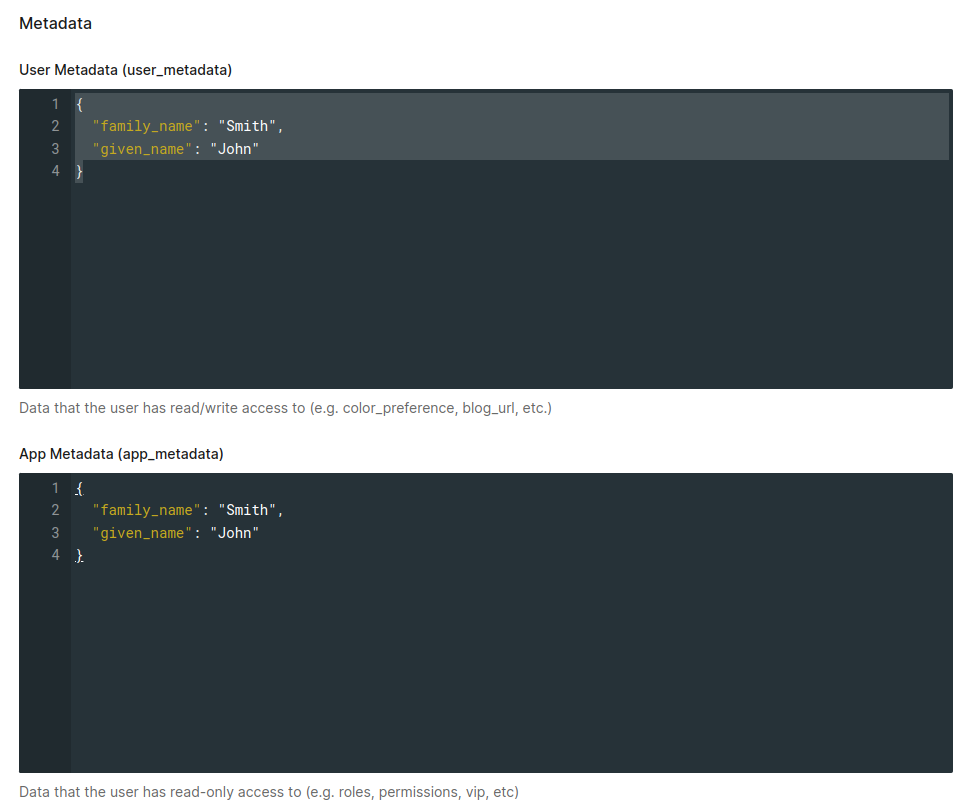
Why this matters: The mappings block configured in the previous step maps Auth0’s given_name and family_name fields into the SAML assertion. If those fields are empty in Auth0’s user record, the name attributes will be missing from the SAML assertion, and Simplelists will not be able to display the user’s full name. The integration will still work for login purposes, but user profiles in Simplelists may show incomplete name information.
The same JSON block is added to both Metadata and App Metadata to ensure the values are available to the SAML mapping regardless of which source Auth0 uses at assertion time.
- Name not appearing in Simplelists after login: Confirm the field names in the metadata exactly match the keys used in the mappings block (given_name and family_name, not firstName/lastName or similar variations). Auth0 field names are case-sensitive.
- Changes not reflected immediately: After saving metadata, existing active Auth0 sessions may not pick up the change until the user logs out and back in. Ask the user to sign out and attempt a fresh SAML login to verify the name is now populated correctly.
- Users managed via an external directory (e.g. Active Directory): If Auth0 is connected to an external directory, the name fields may be automatically populated from that source and overwrite metadata on each sync. Confirm the name fields are not already being provided by the connection before adding metadata manually.
Testing Login
With Auth0 fully configured, this section verifies that the end-to-end login flow works as expected. Testing before rolling out to all users means any misconfiguration can be caught and corrected without impacting anyone else.
-
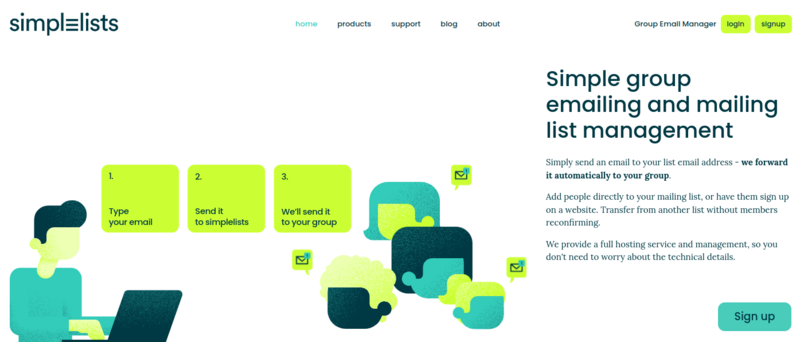
Open the Simplelists web page (https://www.simplelists.com)
-
Click Login
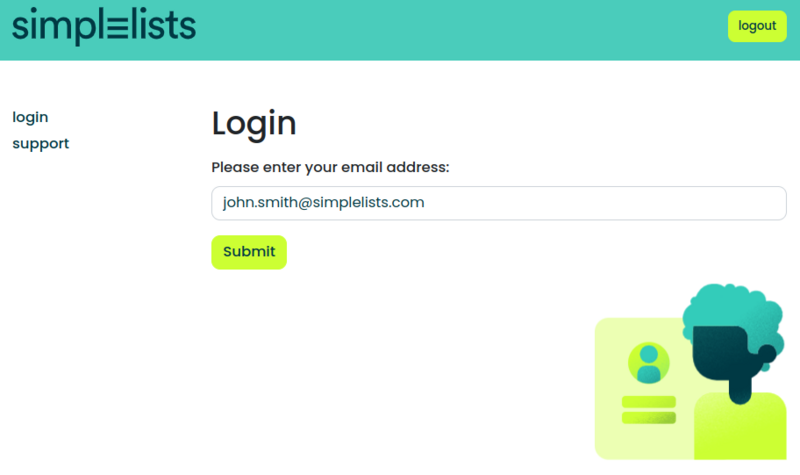
- Enter your Auth0-enabled email address and click Submit.
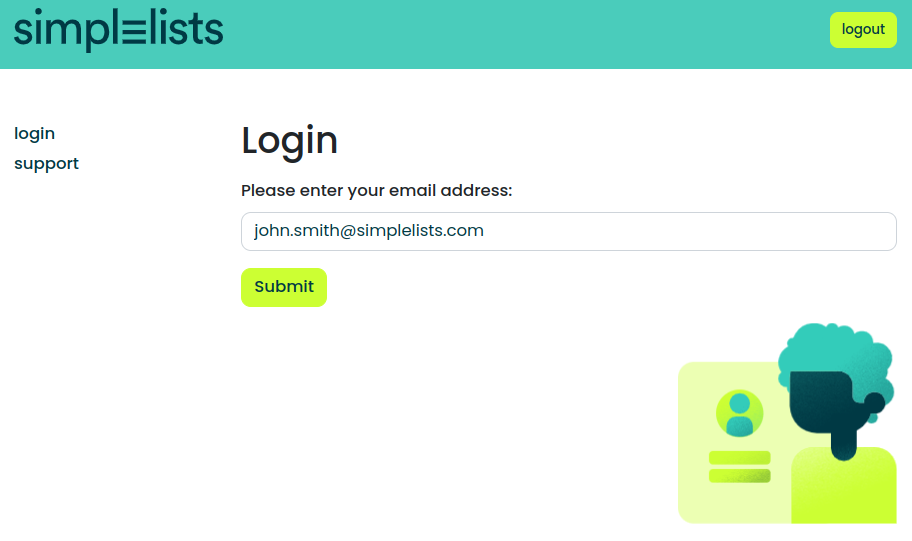
If everything is correctly configured you will be presented with the Auth0 login page.
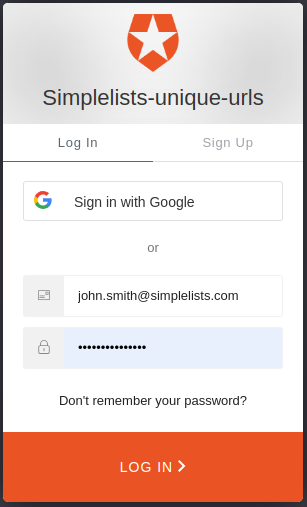
- Enter the email address that you have enabled for Auth0 in Simplelists
- Enter your password
- Click Sign On
You should be logged into the Simplelists web page as your user.
Use a test user account for your first login rather than an admin account, so that any session or permission issues do not affect your administrative access.
Troubleshooting / FAQs
The Auth0 login page never appears – Simplelists shows an error immediately after entering the email address.
The SAML redirect from Simplelists to Auth0 is failing. The most likely cause is a mismatch between the metadata you uploaded to Simplelists (specifically the SAML endpoint URL) and your actual Auth0 tenant. Re-download the Identity Provider Metadata from the Auth0 addon settings (Step: Settings) and re-upload it to Simplelists to ensure they match.
Auth0 authenticates successfully but redirects back to Simplelists with an error.
Auth0 accepted the credentials but Simplelists rejected the SAML response. Check three things in order: (1) the audience value in the JSON configuration matches exactly what Simplelists expects; (2) the signingCert in the JSON is the certificate for your current Auth0 tenant; (3) the Application Callback URL (Reply URL) matches what Simplelists provided. A mismatch in any of these will produce a rejection at this stage.
Login works but the user’s name appears blank or incorrect in Simplelists.
The name attributes are not being passed in the SAML assertion. Confirm the user’s Auth0 metadata contains given_name and family_name keys (Step: User Settings for Name) and that the mappings block in the JSON configuration references these same field names. Ask the user to log out of both Auth0 and Simplelists completely before testing again.
The integration worked before but logins are now failing for all users.
The most likely cause after a working setup is an expired Auth0 signing certificate. Check the certificate expiry in the Auth0 addon settings. If expired, rotate the certificate in Auth0, download the new metadata and certificate, and update them in Simplelists. Until both sides are updated, all SAML logins will fail.
Only some users can log in via SAML – others are rejected.
Users who fail may not have their email address registered in Simplelists, or their Auth0 account may not be assigned to the Simplelists application. Confirm each affected user exists in Simplelists with a matching email address, and that they are assigned to the Auth0 application created in this guide.
The JSON configuration shows a parse error when saving in Auth0.
Almost always caused by the signingCert value containing literal line breaks rather than \n sequences. Use the vim command shown in Step: Configure to reformat the certificate as a single line. Alternatively, open a plain-text editor, paste the certificate, then manually replace each line break with the two characters \n before pasting into the JSON.
Related Simplelists SAML2 Guides
Simplelists supports SAML2 single sign-on with all major identity providers. If your organization uses a different identity platform, these guides cover the setup process:
- Configuring a SAML2 Authentication Provider (general guide for any IdP)
- Configuring Azure (Microsoft Entra ID) for Simplelists SAML2
- Configuring ADFS for Simplelists SAML2
- Configuring Shibboleth for Simplelists SAML2
To learn more about Simplelists’ group email products or to start a free trial, visit simplelists.com. If you need help with your SAML2 configuration, get in touch with the Simplelists support team.
References
- OASIS – Security Assertion Markup Language (SAML) v2.0 Standard
- OASIS SSTC – SAML V2.0 Technical Overview
- Auth0 Documentation – Configure Auth0 as SAML Identity Provider
- Auth0 Blog – What Is SAML and How Does SAML Authentication Work
- Wikipedia – SAML 2.0
- Simplelists – Configuring a SAML2 Authentication Provider