Email list hosting service & mailing list manager

Add a subscribe form to your website

Posted on Oct 22, 2017

Having a form on your website that allows people to sign up to an email list is a great way to grow your email list and increase the potential for your messages to be shared beyond your list members. In this short post, we explain what a subscribe form is, how it can work for growing your list, and how to use Simplelists to create a form for your site.

Add a subscribe form to your website

What is a subscribe form?

A subscribe form (sign-up form, email opt-in form) is an embedded/hosted web form that you can put on your website, blog or social media pages so that people can enter their details into the form to sign up to your list/email group. Normally, the form is very straightforward and only has a few fields to get the information needed. Name and email address are most important.

Importantly, this is a way to collect email addresses with permission. The person completing the form is actively agreeing that you can send him or her emails sent to your list. This is good news in terms of abiding by rules related to spam, as well as hopefully resulting in more visits to your website and/or participation in group discussions via clicks from your emails.

Creating a form using Simplelists

First, you need to copy the code from Simplelists. Sign into Simplelists and navigate to 'general settings’ and then the 'subscriptions’ tab. Scroll down to 'web subscriptions’, select the code and copy it. Next, you need to paste the code into your website. Open your website editor and paste the code where you want to the form to appear. This should be somewhere between the <body> and </body> tags. In this short video, you can see the code pasted into a div created for this purpose.

Styling your form

Finally, you can style your form by using CSS to change how your form looks. This means that you can make it match perfectly with the design of your website. You can also edit the HTML to adjust your form. For example, you could add a title above the form or remove some of the form options, to simplify it. You might like to remove the daily digest summary option, the unsubscribe option and/or the notes box. If you remove these three lines of code, you would be left with a form that allows users to leave just their name and email address.

It is a good idea to put your form in a visible place on your site where you receive the most visitors. Examples include: the top side bar of your website/blog, the top navigation bar, the footer, on your 'About’ page, etc.

That’s all there is to adding a subscribe form to your website - simple.

Tags:

Setting email posting permissions

Posted on Oct 3, 2017

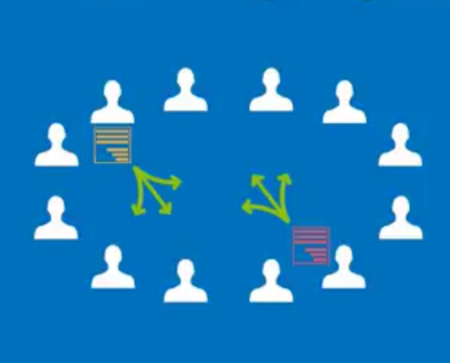
Simplelists is designed to be flexible so that it will suit your needs exactly. You might want to send email newsletters to a list of customers with you alone being able to post to the list. Or, maybe you have a team of people who will all need to be able to send emails to your customers. Or, perhaps you would like to use your list for a private group discussion and you would like anyone on the list to be able to contribute. Whatever your needs, you can customise your list by setting posting permissions. In this short post, we explain how you do this.

Posting restrictions

Login and navigate 'list settings’ in the left hand menu. Under the 'Posting restrictions’ tab you will see the heading 'posting permissions’ with three radio buttons next to it:
  • Allow anyone to send messages
  • Hold all messages for approval
  • Choose specific people who can send messages
If you select 'Allow anyone to send messages’, this permits both members and non-members to send messages to your list without approval being necessary. As an alternative, you can choose to 'Hold all messages for approval’. Or, select 'Choose specific people who can send messages’ to grant specific people permission to send messages to the list. With this third option, you can select all list members or provide the individual email addresses of those permitted to send messages to the list. Just enter their addresses in the box that appears when you select this option. This setting is useful for private group discussions as you can choose to have only specific people post to the list. This setting is also useful for email marketing and newsletters.

Email replies

When thinking about permissions, you may wish to consider where email replies are sent. Select the 'Email customisation’ tab and, under the heading 'List replies’, choose whether the reply is sent to the person who sent the original message (select 'Replies go to poster of message’) or to the whole list (select 'Replies go to list email addresses’). In this section you also have the option to strip attachments from the messages that are sent, truncate long messages to a set character limit, and add a message footer to be attached to all emails sent.

You can watch these instructions in a short video in a previous post on our blog.

Tags:

Group email made simple - a reminder of our features

Posted on Jul 23, 2017

Simplelists is designed to be quick, easy and simple to use. It also has a collection of powerful features for users who want more from their email management software. In this short post, we remind our customers of the power of Simplelists and let those who are thinking of joining us know about the range of features available.

Simplelists features

Fast setup

With Simplelists, you can set up your list in just a few minutes. You simply log into your account and then add people to your list. All you need is their name and email address - you can add people manually or in bulk from a spreadsheet or CSV file. Once a person is added, they will appear as a list member. You can also download your list members’ details to a spreadsheet with a click of a button.

Set restrictions

You have the option to choose who can send messages to your list. For example, you can allow all members to send emails, select members who can send messages, or make sure it is just yourself that can send messages. You can also choose whether replies are sent to the whole list or just to the person who sent the original email. To ensure quality emails are circulated, you can opt to approve and moderate emails before they are sent to the list. The size of emails can also be limited, and attachments can be stripped if required.

Customise your emails

You can let list members’ email addresses be seen, or keep them hidden from other members. Other features include: the ability to add a personalised footer; send your emails in HTML rather than plain text; and personalise your emails by automatically adding details such as the recipient’s name in the email. Once sent, you can archive your emails and access them from a custom website at any time. If you have a busy list, daily digest summaries are a useful feature - instead of receiving emails when they are posted, members receive one email every 24 hours.

Customise subscriptions and integrate with websites

You can choose whether new members can join your list when they wish, or whether this requires approval. Similarly, you can set unsubscribe options, allowing members to leave your list when they choose. To allow members to join your list easily, you can add a subscribe form to your website (this form is fully customisable so you can match it perfectly to the design of your website) and you can easily replace the Simplelists branding with your own logo or branding on all landing pages (where members go when clicking on email/form links). An API is available to enable you to synchronise your Simplelists account with other websites and a multiple list account can be integrated with your domain so that users receive emails from your domain rather than Simplelists.

Automated list management

When an email to one of your list members bounces, you will receive a message to let you know. To save you time, list members with email addresses that bounce messages repeatedly can be removed automatically from your list. If a list member marks your email as spam, they will automatically be removed from the list. This ensures that emails are not repeatedly marked as spam, keeping delivery rates high.

Once your list is set up, you can email everyone on your list from your normal email address. Just send them message to [yourlist]@simplelists.com. It really is that simple. If you would like to try out Simplelists, you can sign up for a free single list account today.

Tags:

Using your own domain with Simplelists

Posted on Jun 23, 2017

If you have a multiple list account, you can use your own domain to replace simplelists.com. In fact, you can add as many domains as you like, which means you can totally brand the system as your own. Combine using your own domain with branding your landing pages for truly professional results. This short post will explain how to use your own domain and, once you have done this, how to improve the deliverability of your emails.

Using your own domain

Set up your own domain

Setting up your own domain is easy. Log in to your Simplelists multiple list account, navigate to 'General Settings’ in the left-hand menu and select the 'Domains’ tab. Enter your domain name and click 'Add’. In the list that follows, set your domain name as 'primary’. You can then view your new email addresses on the 'List members’ page in the left-hand menu.

Configure MX records

Once your domain name is added, you must configure its mail exchange records, using your web hosting control panel. Set the Primary MX record to 'mx1.simplelists.com’ and the Secondary to 'mx2.simplelists.com’. You can see instructions for how to do this using cPanel in this short video. Note that it can take up to 72 hours for the MX changes to come into effect, depending on your web hosting settings.

Make sure your emails are received

There are some simple steps that you can take to improve the deliverability of your emails. SPF records prevent spammers from sending messages with forged email addresses from your domain. DKIM records help to verify the sender and prove that a message has not been altered in transit.

If you are using your own domain, it is recommended that you add both of these DNS records to your domain. When logged into Simplelists with your multiple list account selected, navigate to 'General Settings’ and the 'Domains’ tab. Scroll down to find the details you’ll need to add the DNS records. You can then open your web hosting control panel and complete the required fields for the SPF and DKIM records. You can see instructions for how to do this using cPanel in this short video.

All of these instructions can be viewed in two short videos on a previous post on our blog.

Tags:

Setting up multiple lists with Simplelists

Posted on Jan 17, 2017

Sometimes, you need more than one email list. You may need separate lists for different businesses, groups or organisations, or different lists for groups within your organisation. For example, one list for employees and another for managers, or individual lists for different topics, such as one list for marketing and another for discussion. In this short post, we tell you how to set up multiple lists using Simplelists (or watch a short video if you prefer).

Multiple email lists

Getting started

It is very straightforward to set up multiple lists. Simply go to simplelists.com, navigate to Products, select the blue 'Sign up free for a multiple list’ arrow and fill in your details. You’ll have the option to choose a subdomain for your list (if you own your own domain, you’ll be able to add this later). There is a free, one-month trial for multiple lists so that you can try before you buy.

Managing the lists

To manage your multiple lists, simply log in using your simplelists username and password and select your multiple lists account from the 'Account’ drop-down menu on the top right of the screen. On the next screen, verifying your account enables you to add members to your lists without needing them to confirm their email address (although you can still use the confirmation functionality to check that emails are valid). Simply enter the details of your organisation, what your list is used for, and how you obtained the emails (you can read another post about the rules around how people can opt-in to receiving your emails). Once you have done this, you can create a list by navigating to 'manage lists’ in the left-hand menu, type in the name of the list, and click 'Create’. This is where you could create a number of lists for your different groups (e.g. managers, employees and customers).

Adding members to your lists

Once you have created the lists, you can add some members. Select the address book from the left-hand navigation and choose to add members individually, in bulk, or by uploading a .csv file. If you choose to add them individually, you can enter their details and their email address and then select which list they will belong to. You can also add notes about the members if you wish. 

To view the members of your list, select 'list members’ from the left-hand menu. The email address for your list can be seen at the top of this page. It is possible to use your own domain name for this email address and we will show you how to do this in an upcoming blog post, or you can view a short video that explains what to do).

Tags:

How to build an email list

Posted on Sep 2, 2016

If you are using Simplelists for marketing, you will understand the importance of having a healthy email list to ensure that you can contact a range of clients and drive success in your business. If you are just starting a business, building a list of contacts or 'members’ can be a challenge, especially at a time when your customers are receiving other marketing messages in their inbox and becoming more sensitive to spam. Despite these challenges, there are some simple and effective ways to develop a relevant list of members who will want to receive your emails.

Build an email list

Make it easy for people to sign up to your list

There are several ways that you can encourage people to sign up (’opt-in’) to receiving your emails. You could put a form on your website - make sure it looks 'clean’ and matches the rest of the site, place it near the top of the page, and add a short piece of text to explain 'what’s in it for them’ if they sign up. You can read one of earlier posts that explains how to create a subscribe form for your site, using Simplelists. Try not to ask for too much information at this stage - an email address is really all you need, although asking for a first name will also allow you to personalise your emails when you contact them.

Other places you could consider placing a subscribe form are: after blog posts, in your site’s footer, on your 'About’ page, or in a popup box (although browsers tend to discourage pop-ups these days as people can find them irritating). You can also use social media to encourage people to sign up and/or visit your website. If you are a keen blogger, writing guest blogs accompanied with a sign-up form can also work well.

Sign up at the point of sale or when completing other forms

If your website/product requires people to set up an account or fill in a form on your website, you could also incorporate email list sign-up into this process. Make sure that the reason/incentive for registering is clear though, and relevant to your target audience. You could make it as simple as including a check box that reads 'Subscribe to our mailing list?’ that they can check when registering.

Word of mouth/events

It can be effective to offer those people who have been on your list for a while a small incentive or discount that may encourage them to tell others about your site/product. Make sure you ask for the friend’s email address and first name (again, to allow personalisation).

Let them know what to expect

It is good practice to make sure that your customers know exactly what to expect when they subscribe to your list. You should let them know what to expect with regards email frequency and content, and reassure them that they can unsubscribe at any time. It is a good idea to familiarise yourself with the law surrounding email marketing so that you don’t break any of the rules.

Tags: