
Email analytics for group email lists focuses on delivery infrastructure signals, not behavioral engagement signals. The metrics that matter are delivery rate (the percentage of messages that reached member mail servers), bounce rate (the percentage that failed permanently or temporarily), complaint rate (the percentage of recipients who marked messages as spam), and unsubscribe rate (the percentage who opted out).

Communication for universities operates across three distinct audiences: current students, faculty and staff, and alumni. Each audience has different information needs, different communication expectations, and different relationships with the institution.
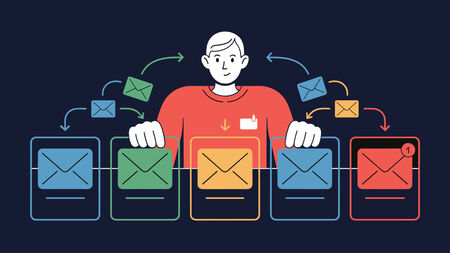
Email segmentation is the practice of dividing an email list into smaller groups and sending each group a message tailored to their needs.

The email customer journey is a well-established idea in digital marketing. Most definitions describe a funnel: prospect receives a promotional email, clicks a link, buys something, and either becomes a loyal customer or churns. That model works for ecommerce and SaaS. It does not describe what happens on a group email list.

Organizational communication is the flow of information within and between an organization and its members. Email lists are one of the most reliable channels for reaching an entire group at once, because they work regardless of which apps or platforms members use. A dedicated group email list, rather than a marketing platform or shared inbox, is what most organizations need when reliable group communication, not campaign delivery, is the goal.

Email data security for group email environments requires encryption in transit, strict access controls, GDPR-compliant data retention policies, and proper member management. Unlike individual email accounts, mailing lists multiply risk – one breach exposes every member’s address, and one careless forward can leak sensitive discussions to unintended recipients.

Email processing in mailing list software handles messages automatically – receiving emails, verifying senders through SPF, DKIM, and DMARC authentication, filtering spam email, checking posting permissions, and distributing approved messages to all members.

Cloud email security is easy to underestimate because so much of it sits in the background, unnoticed until something goes wrong. But for organizations that rely on shared inboxes, mailing lists, and group communication, the risks are not theoretical.

When someone asks whether your email is “encrypted”, they are usually asking a harder question: can you prove your messages are protected in the way your policy assumes, even when they go to an email list, get forwarded, or land in an archive.

For universities, law firms, associations, and professional organizations, email is rarely just a communication tool. It is part of your operating record. Policy announcements, governance updates, alumni newsletters, member notices, and client alerts all go out via mailing lists.

Email is still one of the most common ways you communicate with colleagues, clients, and members. But when messages contain personal data, financial information, legal material, or internal discussions, an important question arises: is email secure for sensitive data?

You should clean your email list at least every three to six months — quarterly for most organizations. The right frequency depends on your list size, sending cadence, and how quickly membership changes.